
This quick guide will show how to install OpenVAS on Kali Linux 2016.2 and some basic use cases. OpenVAS in their own words is “The world’s most advanced Open Source vulnerability scanner and manager.” Although I can’t confirm these claims, it is a very nice scanner that provides scheduling abilities, reporting, and has new NVTs (Network Vulnerability Tests) added regularly.
The Greenbone Security Assistant web client supplied by OpenVAS provides user management, search functions, archiving of scans, and the ability to compare two scans of the same host to see if anything has changed for the better or worse. This is a handy tool for any organization’s security or systems administrations teams because it allows them to share scan results without having to run them multiple times. Best of all, the price is right: free!
This was successfully completed with a fresh install of Kali Linux 2016.2 mid-December 2016.
After this is installed, I ran software updates. This will take a while. Go lift some weights or something:
root@kali:~# apt update && apt upgrade
Next, I installed the openvas package using apt. This also takes a while. It was about 1GB of dependencies to download:
root@kali:~# apt install openvas
This prompted me to enable redis. Select yes by hitting enter:

Next, start the initial setup of OpenVAS. This downloads all of the up to date vulnerability information from OpenVAS’s community feeds. This process also takes several minutes to complete, so now would also be a good time to go do something else for a while.
root@kali:~# openvas-setup
/var/lib/openvas/private/CA created
/var/lib/openvas/CA created

[i] This script synchronizes an NVT collection with the 'OpenVAS NVT Feed'.
[i] The 'OpenVAS NVT Feed' is provided by 'The OpenVAS Project'.
[i] Online information about this feed: 'http://www.openvas.org/openvas-nvt-feed.html'.
[i] NVT dir: /var/lib/openvas/plugins
...
...
Rebuilding NVT cache... done.
User created with password 'XXXXXXXX-XXXXX-XXXX-XXXX-XXXXXXXXXXXX'.
Keep note of this password, you will need it next. Browse to https://127.0.0.1:9392 and accept the certificate for OpenVAS. Login as admin with the password provided on the last line of openvas-setup:
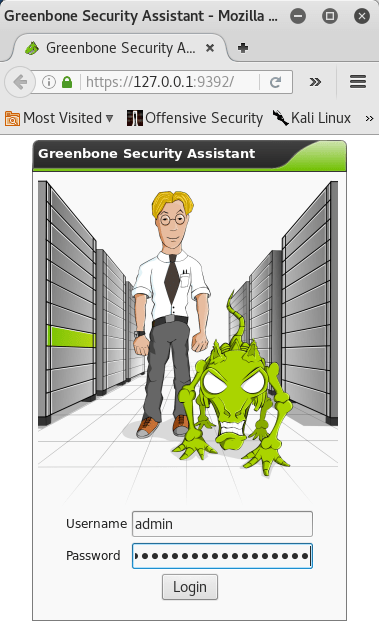
If all went according to plan, you should now be at a welcome screen that looks something like this:

From here, I changed the admin user’s password. Do this by clicking on your username in the upper right hand corner of the page, then click on the wrench icon on the following page. From there, simply fill out the old and new password fields then click on the Save My Settings button at the bottom of the form:


Congratulations. OpenVAS is now installed and ready to be used. For demonstration purposes, I will configure a target and task to scan a Metasploitable virtual machine on my network.
First create a new target. Do this by going to Configuration -> Targets, then clicking on the star. My Metasploitable VM is located at 172.16.158.130:

Next, fill out the form that appears after you click on the star icon. Give your target a name, comment, and set the host appropriately. In my case, this is 172.16.158.130. I changed the port list to use both TCP and UDP, and left the Alive Test to default. Depending on the circumstances, you may need to change these settings. One common example is that some hosts on a network may not respond to pings due to firewall settings. For these hosts,I set the Alive Test to “Consider Alive” so it scans it even if it is not pinging. Click on Create Target to finish this process.
From here, you will need to create a new task. Do this by going to Scan Management -> Tasks and clicking on the blue and white star button to create a new task:

This presents you with a form much like the previous step. Give your task a name, assign the target via the drop down box, and select which Scan Config to use. I chose “Full and Fast” for this demonstration. Click on Create Task to finish this step.
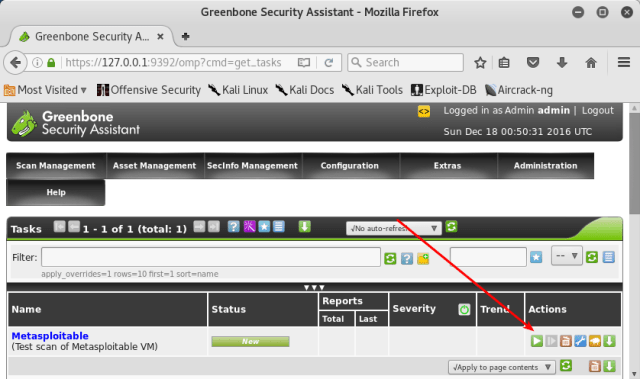
Once your task is created, clicking on Scan Management will bring you to a page with the scan listed. Click on the green and white play button to run this scan right now:
Clicking on Scan Management again brings you back to the same page, but shows the progress of the scan. Clicking on the scan name itself will bring you to a new page that can be configured to refresh automatically:

This scan took several minutes to complete. These scans can take several hours depending on the size of your network and the depth of the scan you have selected. Beware of how long these scans take and the resources involved to complete them if you plan on using this against your own networks. Once the scan has reached 100%, you can review the results by clicking on the report:

From here, there are a number of additional things to do with OpenVAS that are beyond the scope of this document:
- Create additional targets and tasks
- Schedule routine scans of your networks
- Configure the timezone and other system settings
- Create users and groups if using OpenVAS in a collaborative environment
- Update the community feeds
- Set up credentials to scan for local vulnerabilities on machines (needed to mkdir /var/lib/openvas/gnupg for this to work on Kali Linux!)
- Perform manual scans as needed
- Compare two scans to see what has changed over time
- Configure multiple types of alerts: email, syslog, HTTP, Sourcefire Connector, SCP, SNMP, …
- Securing your OpenVAS setup to prevent it being from being misused or hacked.
Performing the tasks listed above would barely scratch the surface of OpenVAS’s capabilities. This is a very powerful tool that helps locate known security bugs and mis-configurations on your networks. Having a tool such as this is extremely valuable if you have more than a small handful of machines to deal with.
Periodic scans of your network using OpenVAS would be easy to implement using a modest virtual machine or dedicated piece of hardware. Scheduling daily or weekly scans and combining them with email reports could be a huge help for an organization’s security. I have successfully used OpenVAS to scan a network of ~250 machines on a semi-regular basis on an old 2 core machine with 2GB of RAM and a 100GB hard drive without any issues. I think the official hard drive requirement of OpenVAS is 10GB, so you could probably get by with 10-20GB of hard drive on a virtual machine.
Obviously, if OpenVAS becomes a more important fixture on your networks and your budget allows, you can use higher quality hardware or allocate more resources to your virtual machines. For larger and more complicated networks, OpenVAS slaves can be configured to aid with scanning. If you are the sole security administrator for your network, it may be a better solution to run this as needed on a virtual machine on your workstation than to set up dedicated hardware.
